![[AWS CentOS] Django Nginx uWSGI 연동하기](https://img1.daumcdn.net/thumb/R750x0/?scode=mtistory2&fname=https%3A%2F%2Fblog.kakaocdn.net%2Fdn%2F4zk8e%2FbtqzOmBycrw%2F03zZsUAD2yEkxkKj1nGBG1%2Fimg.png)
Django Nginx uWsgi 연동하기
AWS에서 Free Tier 서버 기본 선택 시에 설치되는 instance이며,
CentOS 이며, django는 미리 구축한 상태입니다.
( 그러나 연동을 위한 설정은 해주지 않은 상태였습니다)
아래 같은 환경에서 진행하였다.
$ cat /etc/*release*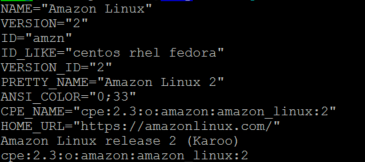
0. 준비물
django는 설치되어있다는 가정하에, settings에 static 폴더와 media 폴더 경로를 설정하지 않았다면 설정해준다.
$ settings.py

STATIC_URL = '/static/'

STATIC_ROOT = '/{프로젝트 경로}/assets/'
STATICFILES_DIRS = [
    os.path.join(BASE_DIR, 'static'),
]

# media file (as a upload file)
MEDIA_URL = '/media/'
MEDIA_ROOT = os.path.join(BASE_DIR, 'media')

DATA_UPLOAD_MAX_MEMORY_SIZE = 1024000000 # value in bytes 1GB here
FILE_UPLOAD_MAX_MEMORY_SIZE = 1024000000
$ urls.py
from django.conf import settings
from django.conf.urls.static import static
urlpatterns = [
...
] + static(settings.STATIC_URL, document_root=settings.STATIC_ROOT)
STATIC_ROOT 경로의 assets 폴더는 제가 직접 만든 폴더이며, 이는 static폴더로 대체가 불가능하다. static폴더 경로를 써줄 경우 아래와 같은 에러가 난다.
collectstatic 명령어로 static 파일을 모을 때, STATICFILES_DIRS 폴더에 등록한 폴더들의 파일들을 STATIC_ROOT로 모으게 되기 때문에, STATIC_ROOT를 포함시키면 안된다는 이유이다.
ImproperlyConfigured: The STATICFILES_DIRS setting should not contain the STATIC_ROOT setting
(https://stackoverflow.com/questions/27213752/collecting-staticfiles-throws-improperlyconfigured)
프로젝트 경로와 프로젝트의 venv (파이썬 가상환경) 경로를 인지해두자
1. Nginx
$amazon-linux-extras install nginx1.12
설치 시
nginx 설정파일 등 경로
/etc/nginx
주요 명령어
systemctl start nginx
systemctl restart nginx
systemctl stop nginx
2. uWSGI
$ yum install -y gcc

$ (venv) pip3.7 install uwsgi
설치 후 옵션 설정
$ mkdir -p /etc/uwsgi/sites

$ vi /etc/uwsgi/sites/django.ini
[uwsgi]
### Django Settings
# base directory
chdir = /프로젝트 경로     # manage.py가 있는 폴더

# python path
home = /.../venv  # 파이썬 가상환경에 파이썬을 설치해두었다면 venv 경로, bin 전까지

# virtualenv path
virtualenv = /.../venv  # bin 전까지

# wsgi.py path
module = 프로젝트명.wsgi:application

master = true
processes = 5

uid = root
socket = /var/run/uwsgi/django.sock  # 경로기억해두자
chown-socket = root:nginx
chmod-socket = 666
vacuum = true

logto = /프로젝트 경로/uwsgi.log
Hot Ez Ex) mkdir에서 -p 옵션이란, 폴더를 만드는 도중에 없는 폴더까지 다 만들어주는 옵션이다.
서버 재실행 등의 상황에 대비해 uwsgi를 서비스에 등록한다
$ vi /etc/systemd/system/uwsgi.service


[Unit]
Description=uWSGI service

[Service]

ExecStartPre=/bin/mkdir -p /var/run/uwsgi

ExecStartPre=/bin/chown root:nginx /var/run/uwsgi

ExecStart=/.../venv/bin/uwsgi --emperor /etc/uwsgi/sites
Restart=always
Type=notify
NotifyAccess=all

[Install]
WantedBy=multi-user.target


$ systemctl start uwsgi
$ systemctl enable uwsgi
3. uWSGI < - > Django는 OK, nginx < - > uwsgi를 위하여
이제 uwsgi이 설치되었고, 이것이 django 설치 시 설치되어있던 wsgi.py를 읽어 소켓에서 수신 대기하다가 (django.sock) uwsgi 프로토콜을 통하여 통신하게된다.
nginx는 이 uwsgi와 통신하기 위하여 reverse proxy 기능을 이용한다.
nginx가 uwsgi와 통신하도록 하기 위한 설정을 해주자.
$ sudo vi /etc/nginx/conf.d

user nginx;
worker_processes auto;
pid /run/nginx.pid;

# Load dynamic modules. See /usr/share/nginx/README.dynamic.
include /usr/share/nginx/modules/*.conf;

events {
    worker_connections 1024;
}

http {
    log_format  main  '$remote_addr - $remote_user [$time_local] "$request" '
                      '$status $body_bytes_sent "$http_referer" '
                      '"$http_user_agent" "$http_x_forwarded_for"';

    error_log /var/log/nginx/error.log;
    access_log  /var/log/nginx/access.log  main;

    sendfile            on;
    tcp_nopush          on;
    tcp_nodelay         on;
    keepalive_timeout   65;
    types_hash_max_size 2048;

    include             /etc/nginx/mime.types;
    default_type        application/octet-stream;

    # Load modular configuration files from the /etc/nginx/conf.d directory.
    # See http://nginx.org/en/docs/ngx_core_module.html#include
    # for more information.
    #include /etc/nginx/conf.d/*.conf;

    upstream django {
        server unix:/var/run/uwsgi/django.sock;
    }

    server {
        listen       80 default_server;
        listen       [::]:80 default_server;
        server_name  _;
        root         /usr/share/nginx/html;

        # Load configuration files for the default server block.
        include /etc/nginx/default.d/*.conf;

        location = /favicon.ico { access_log off; log_not_found off; }

        location / {
                include uwsgi_params;
                uwsgi_pass django;
        }

        location /static/ {
             alias /{프로젝트 경로}/static/;
             expires 30d;
        }

        location /media/ {
             alias /{프로젝트 경로}/media/;
        }

        error_page 404 /404.html;
            location = /40x.html {
        }

        error_page 500 502 503 504 /50x.html;
            location = /50x.html {
        }
    }

}
nginx 설치 시 기본 설정되어 있는 것에서 추가된 것 ↓
    upstream django {
        server unix:/var/run/uwsgi/django.sock;
    }

    server {

        ...

        location / {
                include uwsgi_params;
                uwsgi_pass django;
        }

        location /static/ {
             alias /{프로젝트 경로}/static/;
             expires 30d;
        }

        location /media/ {
             alias /{프로젝트 경로}/media/;
        }
}
경로 설정 시 특히 주의해야 할 것은 alias 와 root 차이를 아는 것이 중요하다.
이에 실수하면 django 관리자 페이지에서 css가 보이지 않는 등 static 파일을 가져오지 못하는 현상이 일어난다.
위 설정을 마치고 다시 nginx와 uwsgi를 restart 시켜주고,
80 포트로 진입해보면 OK
잘 마무리 되었다면, 자신이 설정하였거나 설정된 파일들의 경로를 잘 기억하자
nginx 설치 경로 (자동) : /etc/nginx
uwsgi 경로 (자동) : /etc/uwsgi
django.sock 경로 : /var/run/uwsgi/django.sock
service : /etc/systemd/system/uwsgi.service
마지막으로, 기존 8000 포트로 django 만을 작업할 때에는 서버의 변경사항이 바로바로 적용된다. 하지만, 연동 완료 직후부터는 80 포트의 경우 uwsgi를 재실행 시켜주어야만 적용된다.
80포트의 경우, 서버 파일 변경 이후
$systemctl restart uwsgi'Server > Django' 카테고리의 다른 글
| [Django] upload multiple image file in one model (1) | 2019.11.30 |
|---|---|
| [Django] AWS S3와 연동하기 (0) | 2019.11.20 |
| [Django] Rest Framework / ViewSet QuerySet Params (0) | 2019.11.08 |
| [django] User Profile Response 요청하기 (0) | 2019.10.06 |
| [Django] RestFrameWork 설치 (0) | 2019.09.19 |